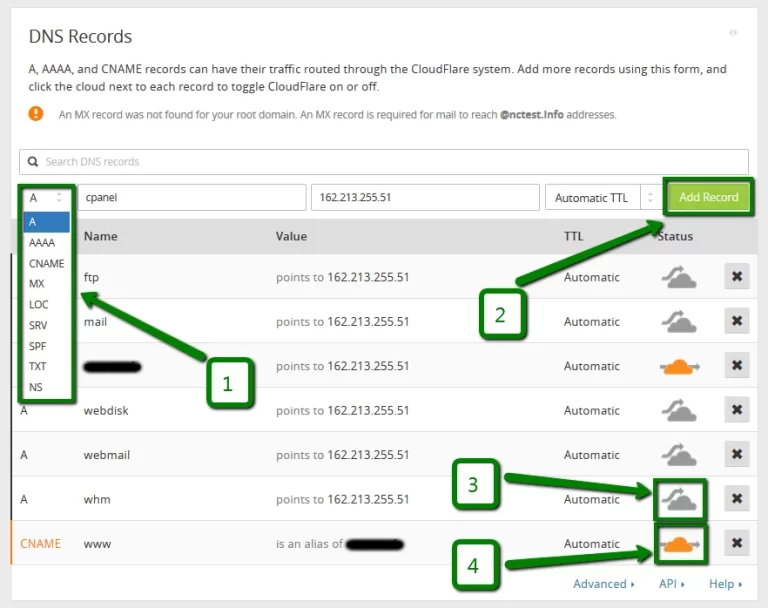
This tutorial covers adding general DNS records and specifically A, AAAA, CNAME, MX and TXT records.
To create a DNS record in the dashboard:
- Log in to the Cloudflare dashboard and select an account and domain.
- Go to DNS > Records.
- Click Add record.
- Choose a record Type.
- Complete the required fields, which vary per record. Particularly important fields (for some records) include:
- Proxy status: For
A,AAAA, andCNAMErecords, decide whether hostname traffic is proxied through Cloudflare. - TTL: Short for Time to Live, this field controls how long each record is valid and — as a result — how long it takes for record updates to reach your end users.
- Comment and Tag: Record attributes meant for your reference.
- Proxy status: For
- Click Save.
Please select which record you need help adding: A Record AAAA Record CNAME Record MX Record TXT Record
Other records that are not directly covered in this tutorial can be added in a similar way via the DNS app in your dashboard
Source: CloudFlare Community


0 Comments