Over 28 million live websites now use WordPress. While it’s great to be part of such a large and active community, this popularity makes the platform a prime target for malicious hackers.
Fortunately, by implementing some simple security tactics and performing regular checks, you can make your site much less vulnerable to attack. This can help you avoid losing customers, traffic, revenue, or confidential information due to a preventable security breach.
In this post, we’ll discuss why protecting your WordPress site is more important than ever. We’ll then share nine of our top tips for boosting your site’s security. Let’s get started!
An Introduction to WordPress Security
WordPress powers over 40 percent of the web, which makes it an attractive target for hackers. If a malicious third party manages to identify a vulnerability with one WordPress website, they could potentially use that same security loophole against the millions of other websites that are built on the same platform.
With this mind, it’s unsurprising that attacks against WordPress are on the rise. Wordfence recorded 4.3 billion attempts to exploit vulnerabilities in 2020. When asked about web security, over 70 percent of developers, freelancers, and agencies confirmed that they are increasingly worried about their websites. In fact, 25 percent of respondents confirmed they’d had to deal with a hacked website in the month prior to participating in the survey.
The WordPress team has a strong track record of identifying and addressing vulnerabilities in the platform. However, no software is perfect. In addition, many website owners choose to extend WordPress core with themes and plugins. These third-party products can add new designs and features to your site – but can also add new security vulnerabilities.
According to Patchstack’s security whitepaper, third-party plugins and themes account for 96.22 percent of detected WordPress security vulnerabilities. The total number of active and vulnerable theme and plugin installations detected throughout 2020 came in at a staggering 70 million.
If a hacker does manage to take control of your site, the consequences could be disastrous. The attacker might deface your site, steal your data, or redirect your loyal customers to a spam website.
The impact of these malicious activities can be far-reaching. They may include a loss of trust amongst your customers and missed sales, right through to potential legal action due to your failure to protect your visitors’ information.
9 Ways to Keep Your WordPress Website Secure in 2021
WordPress may be a favorite target amongst hackers, but that’s no reason to switch to a different Content Management System (CMS). Let’s take a look at nine tips that you can use to harden and protect your WordPress website against common attacks.
1. Choose a Hosting Provider That Prioritizes Security
The most important way to keep your WordPress website safe is to choose a hosting provider that prioritizes security. Wherever possible, we recommend opting for a hosting solution that offers built-in security features and tools.
At GIWS, we take security seriously, which is why all of our hosting packages include the Cloudflare Web Application Firewall (WAF). This tool can help protect your site against brute-force attacks in which a hacker tries to submit many different passwords and usernames in the hopes of guessing the combination correctly.
Our hosting plans also come with the cPanel control panel and Softaculous installer. This popular installer provides access to a wide range of add-ons, tools, and software, including many that can help you protect your website.
Running outdated software can make your site more vulnerable to attack. If you do choose to install additional software via Softaculous, then we’ll email you every time an update becomes available. This ensures you won’t miss any critical security updates or bug fixes that can help bolster your site’s security.
If you do have a security concern, then it’s important to address it straight away. That’s why we also offer 24/7 customer support to all of our hosting customers.
2. Install a Secure Sockets Layer (SSL) Certificate
Without a Secure Socket Layer (SSL) certificate, malicious third parties may be able to intercept the data your website sends and receives. This includes login credentials and payment details. If a hacker manages to access this information, it could damage your reputation and destroy users’ trust in your website. It may even land you in legal hot water due to data protection laws.
An SSL certificate can help ensure your private data remains private by transferring information via Hypertext Transfer Protocol Secure (HTTPS) instead of Hypertext Transfer Protocol (HTTP). As the name suggests, HTTPS is more secure than HTTP, as it enables you to encrypt any data that flows in and out of your website.
To help you meet this important security requirement, we provide several different types of SSL certificates:
After procuring your SSL certificate, we’ll send you an SSL Token via email. You can install your certificate by adding it to your website.
If you’re a cPanel user, then you can log into your account and launch the SSL Status:
We’ll then ask some simple questions about your website and your certificate. After providing these details, AutoInstall SSL will upload your certificate and your data will be encrypted.
3. Implement a Content Delivery Network (CDN)
If a malicious third party manages to break into your site using a brute-force attack, they could wreak havoc. They might steal your data, deface your site, or even delete your WordPress website entirely.
You can help protect your site against brute-force attacks by using a long, complex password that features a mix of numbers and symbols, plus uppercase and lowercase letters. However, some hackers use automated scripts and bots to bombard your site with thousands of login credentials. Even if you follow password best practices, your site may still fall victim to a brute-force attack.
To protect against these automated scripts and bots, you may want to consider using a Content Delivery Network (CDN). Although this tool is often used to improve website performance, it can also block malicious requests from ever reaching your site.
This may prevent hackers from hammering your site with login credentials. At GIWS, we offer the Cloudflare CDN to all our customers: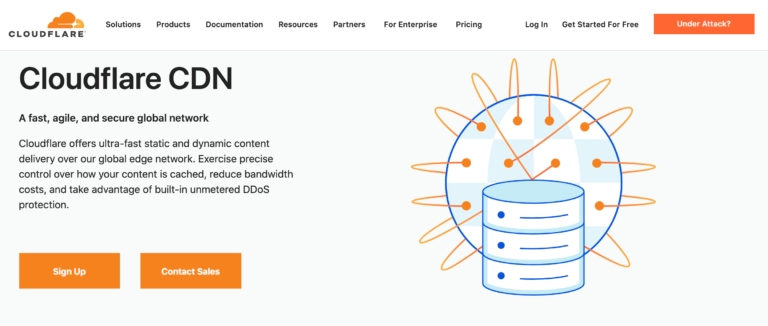
In addition to offering brute-force protection, Cloudflare’s network is designed to monitor and mitigate Distributed Denial-of-Services (DDoS) attacks. In this scenario, a hacker floods your network with so much malicious traffic that it exceeds your website’s capacity to process requests, at which point legitimate requests may be ignored.
You can configure your Cloudflare CDN by logging into cPanel and navigating to Software > Cloudflare. You can then follow the onscreen instructions to ensure Cloudflare is set up correctly for your particular website.
4. Use Plugins and Themes Safely
WordPress has huge directories of themes and plugins that can help you create beautiful, feature-rich websites. However, these third-party extensions can also make your site vulnerable to attack. In 2019, 97.2 percent of WordPress vulnerabilities were related to plugins.
To help protect your website, you should only install plugins from reputable sources. Wherever possible, we recommend using the official WordPress Plugin Repository, as it has strict security guidelines: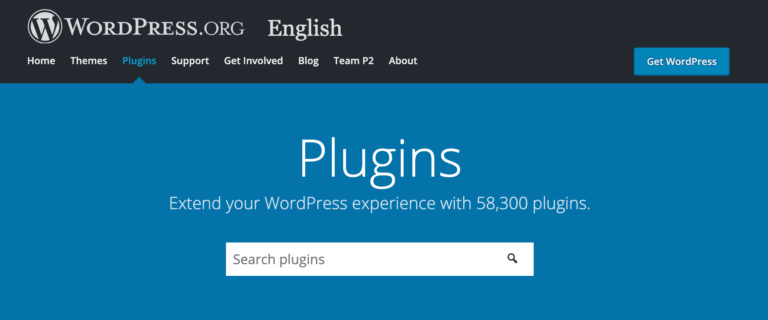
Alternatively, you can purchase themes and plugins from reputable third-party marketplaces such as CodeCanyon. Even if you’re using a quality source, it’s still smart to evaluate the theme or plugin, including examining when it was last updated: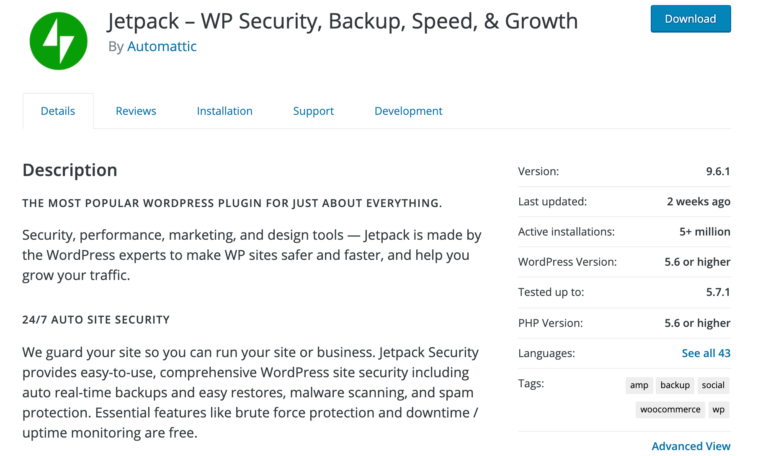
We also recommend checking the software’s reviews, particularly the most recent ones. A spate of negative comments may indicate a security issue with the latest release.
Themes and plugins also add code to your site, which may contain vulnerabilities. A responsible developer will work hard to close any security loopholes discovered in their theme or plugin, and will often release an update that contains a solution for any recently-discovered vulnerabilities. For this reason, it’s important to keep your themes and plugins up-to-date.
According to WPBeginner, 86 percent of sites are hacked due to outdated software. To minimize your risk, it’s important to install updates as soon as they become available: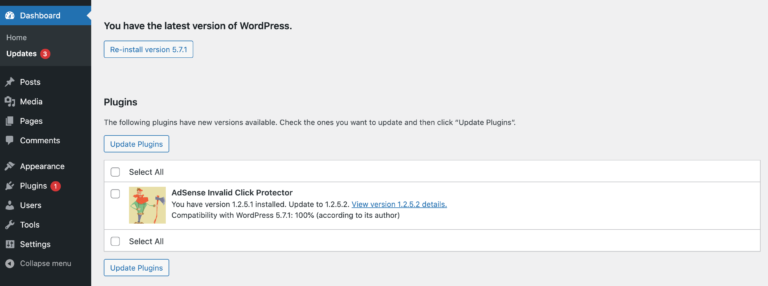
At some point, you may no longer require a particular theme or plugin. If you simply deactivate the software in question, then hackers may still be able to exploit its code. For example, hackers commonly target individual PHP files within a specific plugin.
If you simply deactivate the theme or plugin, then those PHP files will remain accessible and will therefore still be exploitable. This means that it’s crucial to delete extensions that you no longer require.
5. Install a Web Application Firewall (WAF)
Themes and plugins can potentially introduce vulnerabilities to your website. Ideally, when such a problem is discovered, the theme or plugin developer will rush to patch the issue and release an update.
However, this isn’t always the case, as some complex vulnerabilities may take time to fix. While we’d always recommend removing insecure software, this isn’t always feasible. For example, perhaps the plugin in question delivers your website’s core functionality.
If you do need to continue using a vulnerable plugin, then you can make it more difficult for hackers to abuse these known security loopholes. One method is to use a Web Application Firewall (WAF) to filter out malicious requests before they reach your WordPress website. This can also protect your site against Cross-Site Scripting (XSS) attacks.
There are several WAF plugins available for WordPress. However, the Wordfence endpoint firewall is a popular option:
After installing and activating Wordfence, it’s a good idea to leave this plugin in Learning More for at least a week before enabling its firewall. This can help you avoid false positives, where Wordfence blocks legitimate activities.
While the plugin is in Learning Mode, you should perform as many different actions as possible on your WordPress website. This gives Wordfence the best possible chance of learning how to protect your site while also permitting normal activity and visitors through its firewall.
You can put Wordfence into Learning Mode by navigating to Wordfence > Firewall. Then open the Web Application Firewall Status dropdown and select Learning Mode: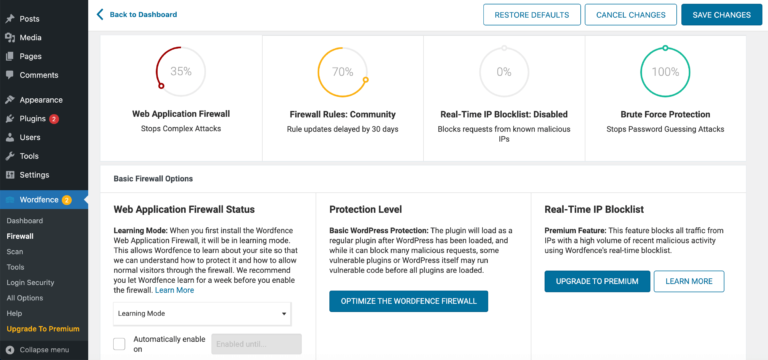
Save your changes, and Wordfence will start monitoring your site. When you’re ready to take Wordfence out of Learning Mode, you can enable the firewall by navigating to Wordfence > Firewall. Then open the dropdown and select Enabled and Protecting.
6. Activate Two-Factor Authentication (2FA)
It’s important to protect your website with a strong password. However, there are some password-based attacks where the strength of your login credentials has no impact on whether that attack succeeds or fails.
This includes credential stuffing attacks, where a hacker attempts to break into your dashboard using thousands, or even millions of username and password combinations. There are even keystroke logging programs that can monitor your keyboard and record every single thing you type, including your password.
One way to protect against these attacks is to enable Two-Factor Authentication (2FA). After activating this feature, anyone trying to access your WordPress website will need to enter the correct login details and then pass an additional security check – such as responding to a push notification on their phone or entering a code sent to their email address – to access your site.
By activating 2FA, you can make it significantly more difficult for a third party to gain access to your website. You can set up 2FA using a mobile application such as Google Authenticator or Microsoft Authenticator:
After installing your chosen mobile app, GIWS customers can enable 2FA by logging into their accounts and navigating to Account > Edit Account Details. You can then select Security Settings in the left-hand menu:
On the subsequent page, select Click here to enable. You’ll then be guided through the process of linking your WordPress site to your authenticator mobile app:
As part of this process, we’ll provide you with a backup code. If you ever lose access to your authenticator app, then you can use this code to recover your WordPress website. To avoid getting locked out of your site, it’s vital that you make a note of this code and keep it somewhere safe.
7. Consider Disabling XML-RPC
Pingbacks are a way to notify other websites that you’ve linked to their content, and vice versa. By default, they’re enabled in WordPress. While this feature can make it easier to respond to comments that mention your site, it can also make your website more vulnerable to DDoS attacks.
WordPress pingbacks are made possible by the XML-RPC interface. However, an attacker might use this feature to bombard your site with pingbacks. This can overload your server and might even take your site offline. For this reason, you may want to consider disabling the XML-RPC interface using the REST XML-RPC Data Checker.
If you do decide to disable pingbacks, then install and activate this plugin in your WordPress dashboard. Then navigate to Settings > REST XML-RPC Data Checker. Next, select the XML-RPC tab and choose Disable XML-RPC API interface: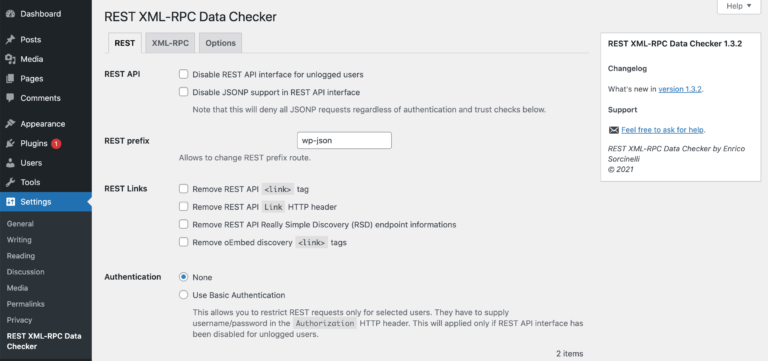
Now you just need to save your changes and pingbacks will be disabled for your website. If you don’t want to use a plugin, then you can block all incoming XML-RPC requests before they’re passed to your site.
This technique does require you to edit your site at the code level, so it’s wise to create a full backup before proceeding. If you’re an GIWS customer, we provide two backup tools that you can access via cPanel:
After creating a backup, connect to your server via File Transfer Protocol (FTP) using an FTP client such as FileZilla. You can then open your .htcaccess file for editing and add the following:
<Files xmlrpc.php>
order deny,allow
deny from all
</Files>
Don’t forget to save your changes and re-upload the file to your server. To verify that XML-RPC is now disabled, head over to XML-RPC Validator and enter your website’s URL. If XML-RPC is disabled, then the Validator should display an error message.
8. Remove the WordPress Theme Editor
By default, you can modify your theme using WordPress’ built-in theme editor. While this is helpful for creating custom themes, it’s also a way for hackers to inject malicious code into your website:
If you don’t need the theme editor, then you may want to consider disabling it. This requires you to edit your website’s code, so we recommend creating a backup before proceeding.
To disable the editor, you’ll need to connect to your server using an FTP client. You can then open your wp-config.php file and add the following after the line that reads “That’s all, stop editing! Happy publishing”:
define( 'DISALLOW_FILE_EDIT', true );
Save your changes and the theme editor will disappear from your WordPress dashboard. If you need to restore the theme editor at any point, then simply connect to your server using FTP and remove the line of DISALLOW_FILE_EDIT code.
9. Protect Your Database Against SQL Injection Attacks
A hacker may attempt to gain access to your WordPress account by injecting malicious SQL queries into your MySQL database. Hackers can launch these SQL injection attacks via any content that accepts user input. This includes many website staples, such as comment sections and contact forms.
Since MySQL is vulnerable to injection attacks, it’s important to keep your database up-to-date. It’s also important to protect your MySQL database with a strong password that has no connection to your website, company, or you as an individual. Here, it may help to use a password generator such as Strong Random Password Generator or LastPass:
You can also make it more difficult for hackers to identify your database by using a unique database name. GIWS customers can change their WordPress database name at any point by logging into cPanel and then accessing the phpMyAdmin tool.
In the left-hand menu, select the database that you want to rename. Then open the Operation tab:
Here, enter the name that you want to use and click on Go. When prompted, opt to reload your database.
Conclusion
As one of the world’s most popular Content Management Systems, hackers are always eager to uncover vulnerabilities in WordPress themes, plugins, and core. If a malicious third party does manage to identify a security loophole, they could potentially use it to launch attacks against millions of WordPress websites – including yours.
By following some simple security precautions, you can immediately make your site less vulnerable to attack. It’s important to start with the fundamentals by vetting all of your themes and plugins carefully and installing an SSL certificate. Once you have a strong foundation, we recommend exploring more advanced security tactics, such as enabling 2FA and disabling the theme editor and XML-RPC when possible.
Your choice of hosting provider is also crucial for security. All of our GIWS packages include features, tools, and add-ons specifically designed to help keep our customers safe, including HackScan Protection, Cloudflare, and a dual firewall. Check them out today!

0 Comments